 Custer
 Why Siding Repair Works Differently in the Sumas Area
Siding repair sounds like a simple job until you actually look at what's failing and why. In the Sumas area, damage almost never shows up the way it does in drier parts of the country. Homes here sit under a steady combination of coastal-influenced humidity, long stretches of driving rain, and a moss season that can run for months at a time. A repair that just patches the visible crack or replaces one warped board without addressing what caused it tends to fail again within a season or two. A repair done right accounts for the whole system behind the siding — the water-resistive barrier, the flashing, the fastening, and the material itself — not just the piece you can see from the driveway.
That's the difference between a patch and an actual repair. This page focuses on that one job, done correctly, for homes in and around Sumas and Custer, Washington.
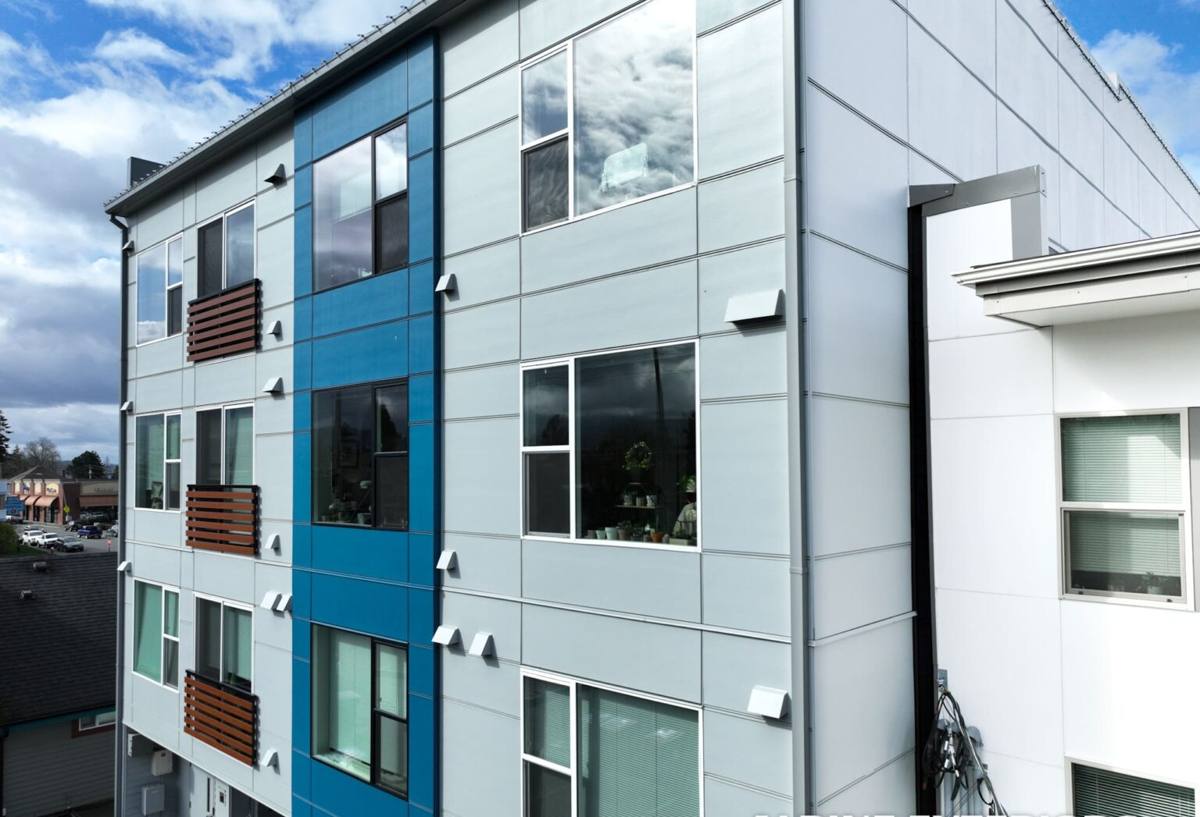
What Whatcom County's Climate Does to Siding Over Time
Salt Air and Corrosion
Proximity to the water in this part of Whatcom County means airborne salt is a real factor, even on homes that aren't right on the shoreline. Salt-laden moisture accelerates corrosion on fasteners, flashing, and any exposed metal trim. When a nail or staple starts to rust behind a siding panel, it loses its grip long before the siding itself looks bad, and that's often the hidden cause of panels that appear to be "coming loose" for no obvious reason.
Driving Rain and Moisture Intrusion
Rain in this region doesn't just fall — wind off the Strait and the lowland weather patterns push it sideways into wall assemblies, especially on west- and south-facing elevations. Driving rain finds every gap in caulking, every under-lapped seam, and every spot where flashing was skipped or installed backward. Once water gets behind siding, it doesn't dry out quickly in a climate this damp, and that's when you start seeing soft trim, staining, and eventually rot in the sheathing underneath.
Moss and Algae Season
Custer and the surrounding Sumas corridor get a long moss season — shaded, north-facing walls and anything under tree cover can stay damp for weeks without direct sun to dry it out. Moss and algae themselves don't destroy most siding materials directly, but they hold moisture against the surface far longer than it would otherwise sit there, and they're a strong visual signal that a wall isn't drying properly between rain events.
Common Repair Calls We See Near Sumas and Custer
Every siding material fails differently, and knowing the pattern helps figure out whether a repair is straightforward or whether it's pointing at a bigger problem.
| Material | Typical Failure Pattern in This Climate | What It Usually Means |
|---|---|---|
| Wood or engineered wood (LP-type) | Edge swelling, delamination, soft spots at butt joints | Moisture has gotten into the panel edges or substrate; often spreads under paint before it's visible |
| Vinyl | Warping, buckling, cracked corners from cold snaps | Thermal movement plus age-related brittleness; repairs are hard to color-match once panels fade |
| Fiber cement (Hardie) | Failed caulking, damaged factory finish at impact points, occasional cracked board from impact | Usually isolated and repairable without the material itself breaking down |
Water Damage and Rot Behind the Surface
This is the most serious category and the one homeowners underestimate most often. A stain, a slightly bowed board, or a musty smell near an exterior wall can mean water has been getting behind the siding for a long time. Any repair on a wall like this has to open things up enough to actually see the sheathing and framing condition — not just swap the surface piece and caulk over it.
Cracked, Warped, or Impact-Damaged Panels
Storm debris, ladders, sports equipment, and simple age all cause isolated panel damage. These are usually the easiest repairs, but matching them correctly — both in profile and finish — matters more than people expect.
Failed Caulking and Trim Joints
Caulking is a wear item, not a permanent seal, and in a climate this wet it tends to fail faster than manufacturers' generic estimates suggest. Once caulking cracks or pulls away at trim boards, corners, and window returns, it becomes the entry point for the next round of moisture damage.
- Visible staining or dark streaks below seams or trim
- Soft or spongy siding when pressed gently by hand
- Peeling paint or bubbling finish in one concentrated area
- Panels that have visibly shifted, bowed, or separated from the wall
- A musty smell near an exterior wall inside the home
- Moss or algae that keeps returning to the same spot within weeks of cleaning
What a Correct Siding Repair Actually Involves
Inspection Before Any Patch
A real repair starts by figuring out why the damage happened, not just what it looks like. That means checking the flashing above the damaged area, looking at how water sheds off nearby rooflines and gutters, and, when there's any sign of moisture intrusion, opening the wall enough to check the condition of the water-resistive barrier and sheathing underneath. Patching over a wet wall assembly just hides the problem for another season.
Matching Materials Correctly
Replacement pieces need to match the existing siding in profile, reveal, and finish — not just be "close enough." On factory-finished fiber cement, that means matching the ColorPlus finish rather than field-painting a patch a slightly different shade. Mismatched patches are one of the most common complaints homeowners have about repairs done by a contractor unfamiliar with the specific product on the wall.
Flashing and Water Management
Any repair that involves removing siding is a chance to fix what actually caused the failure. That usually means correcting or adding flashing at windows, doors, and horizontal trim, lapping the water-resistive barrier the right direction (always shedding water downward and outward, never trapping it), and reinstalling siding with the correct fastener pattern and clearances. Skipping this step and just reinstalling the same siding the same way guarantees the same failure comes back.
Our Repair Process, Step by Step
- On-site inspection. We look at the damaged area and the surrounding wall, checking for signs the problem extends further than what's visible from the ground.
- Diagnosis, not just a quote. We tell you what's actually failing — surface damage, a flashing problem, a moisture issue behind the wall — before we talk about scope.
- Scope and estimate. You get a clear explanation of what needs to be replaced, what can be left alone, and roughly what that will cost, in plain terms.
- Removal and open-wall check. Damaged siding and trim come off carefully enough to inspect the barrier and sheathing behind it, since that's where the real cause usually lives.
- Correcting the cause. Flashing, house wrap, and fastening get fixed before anything new goes back on — this is the step that keeps the repair from repeating itself.
- Reinstallation with matched material. New siding is installed to spec, matched to the existing wall as closely as the product allows.
- Final seal and cleanup. Caulking, paint touch-up where needed, and a walk-through so you know what was done and why.
Repair or Replace? A Realistic Look at the Decision
Not every damaged wall needs a full re-side, and not every "small" repair should be treated as small. Here's how we think through it honestly.
| Factor | Leans Toward Repair | Leans Toward Replacement |
|---|---|---|
| Extent of damage | Isolated to one or two areas | Recurring damage across multiple walls or elevations |
| Age of existing siding | Relatively young, otherwise sound material | Nearing or past the material's realistic service life |
| Cause of failure | One-time event (impact, isolated caulk failure) | Systemic issue — original installation, chronic moisture, material breakdown |
| Match availability | Discontinued color/profile can still be reasonably matched | No realistic match; patches would be visually obvious |
| What's behind the siding | Sheathing and barrier are dry and sound | Rot, mold, or barrier failure found once opened up |
We'll give you a straight answer on which side of this table your home falls on. A contractor who always recommends full replacement, or one who always insists a patch will do regardless of what they find, isn't giving you an honest assessment.
Why We Repair and Rebuild With James Hardie
We install and repair with James Hardie fiber cement exclusively — we don't install vinyl, LP SmartSide, Cemplank, Allura, or primed wood siding on any project, including repairs. When a repair calls for replacing a section of siding on a home that already has a different material, or when a full section needs rebuilding, we'll walk you through why we'd use Hardie for that section and what that means for matching against the rest of the wall.
The short version: Hardie's fiber cement is non-combustible, holds its factory ColorPlus finish far longer than field-applied paint on wood-based products, and doesn't swell or delaminate at cut edges and joints the way engineered wood can when moisture gets in. It's also backward-compatible with itself in a way that matters for future repairs — if a Hardie panel gets damaged five or ten years from now, matching it is a known, predictable process, because the HZ5 product line was engineered specifically for climates like this one. We're not going to pretend every product we don't install is a bad product; we're telling you honestly why we standardized on this one for the weather this region actually gets.
Why a Crew That Already Works Sumas Matters
Siding repair is one of those trades where local experience shows up in small decisions that add up. A crew that regularly works walls in the Sumas and Custer area already knows which elevations take the worst of the driving rain, how aggressively moss comes back on shaded north walls, and what a normal amount of weathering looks like versus what signals a real problem underneath. That translates into faster, more accurate diagnosis on the first visit instead of a guess that turns into a callback.
It also matters for response time. Moisture problems get worse the longer they sit, especially in a climate that doesn't give walls much chance to dry out between storms. A crew that's already working in the area can usually get eyes on a problem faster than one dispatching from farther away, which matters when a small leak is still small.
After the Repair: Keeping Your Siding Ahead of the Weather
A good repair should hold up, but a little seasonal attention goes a long way in a climate this wet. None of this requires special tools or products — just consistency.
- Rinse siding down at least once a year to keep moss and algae from establishing, especially on shaded or north-facing walls
- Check caulking at trim joints, window returns, and corners every spring for cracking or separation
- Keep gutters clean and downspouts directed away from the foundation so water isn't sheeting down walls unnecessarily
- Trim back vegetation that keeps a wall shaded and damp longer than the rest of the house
- Walk the exterior after any major storm and note anything that looks different, even minor, so it can be checked before the next rain
If you're seeing signs of trouble on a home in the Sumas or Custer area, or you just want an honest opinion on whether what you're looking at is a simple repair or something bigger, we're happy to take a look. Estimates are free, there's no pressure, and you'll get a straight answer either way — fill out the form below to get started.